Got a collection of large image files that need to be resized? Tired of resizing them one by one? If so then this article is for you!
We’ll cover everything you need to know about bulk image resizing, including how it affects resolution and which tools are best for the job.
So read on and learn how to resize your images fast!
Many bulk resize tools let you resize and convert images right in your browser so no need to install extra software.
You can just drop images into the tool or upload them in batches for fast and secure processing.

Basics of Bulk Image Resizing
Batch image resizing is the process of resizing multiple images at once. This is a lifesaver when you have hundreds of images to resize. This is often the case when you’re creating a photo album or website.
There are a few ways to do bulk image resizing. You can use a dedicated bulk image resizing tool, an online image resizing tool or a command-line tool. You can resize images by width, height, percentage or even inches for precise control. Many tools also let you set a maximum file size in KB to optimize images for web use.
Note: Most tools maintain the aspect ratio by default unless you change the settings.
Tip: Using preset sizes like ‘medium’ can save time when resizing large batches.
When saving your resized images you can configure the output file name and format and select from formats like jpg, gif, bmp, ico, tiff. You can also convert images to a different format during the resizing process. After you upload your images you can select the ones you want to resize and the rest of the process is handled by the tool. You can then download the resized images often as a zip file. Some tools also let you crop images as part of the resizing process. On desktop tools you can use the right click or a button to quickly access resizing features. You can configure settings like default output format, quality and file name structure for convenience.
Remember to consider resources like memory and processing power when resizing very large batches. Explore advanced features or sign up for additional capabilities to get the most out of your tool.
Example: To set up a batch resize job you might select 100 uploaded images, set the width to 800px, choose ‘medium’ as the preset size, configure the file name to include a date and select jpg as the output format.
Uploaded images are processed and can be downloaded after resizing. With these tools you can create images for different platforms efficiently.
Remember when resizing images the impact on the image’s resolution.
So how does image size affect resolution when batch resizing? Read on and we’ll tell you.
Image Size and Resolution

When you change the size of an image you’re changing the number of pixels it contains. This can affect image resolution, which measures its sharpness and detail.
Imagine you have a 100x100 pixel image. This image has a resolution of 100 pixels per inch (ppi). If you resize this image to 50x50 pixels the resolution will go down to 50 ppi.
In other words the same number of pixels are now spread out over a smaller area.
Resizing an image smaller won’t affect the resolution much. But making a picture larger can cause it to lose quality as the software has to add new pixels to the image.
Benefits of Bulk Processing
When you’re working with multiple images bulk processing can be a game changer for your workflow. Using a bulk image resizer lets you resize multiple images at once saving you a lot of time and effort compared to resizing each image individually. This is especially valuable for photographers, designers and e-commerce sellers who regularly need to process large batches of images for websites, social media or print.
Bulk processing ensures all your selected images are resized to the exact dimensions and image format you need, maintaining a consistent look and quality across your entire collection. By applying the same settings to every image you reduce the risk of human error and guarantee each file meets your requirements for size, format and quality. Whether you’re preparing product photos for an online store or optimizing images for faster website loading a bulk image resizer simplifies the process and helps you deliver professional results every time. In short bulk processing with the right tool not only speeds up your workflow but also ensures your images are uniform, high quality and ready for any platform or purpose
The Best Bulk Image Resizing Programs and Tools
Luckily there are different online photo resizers available each with its strengths and weaknesses. Here are a few of the best:
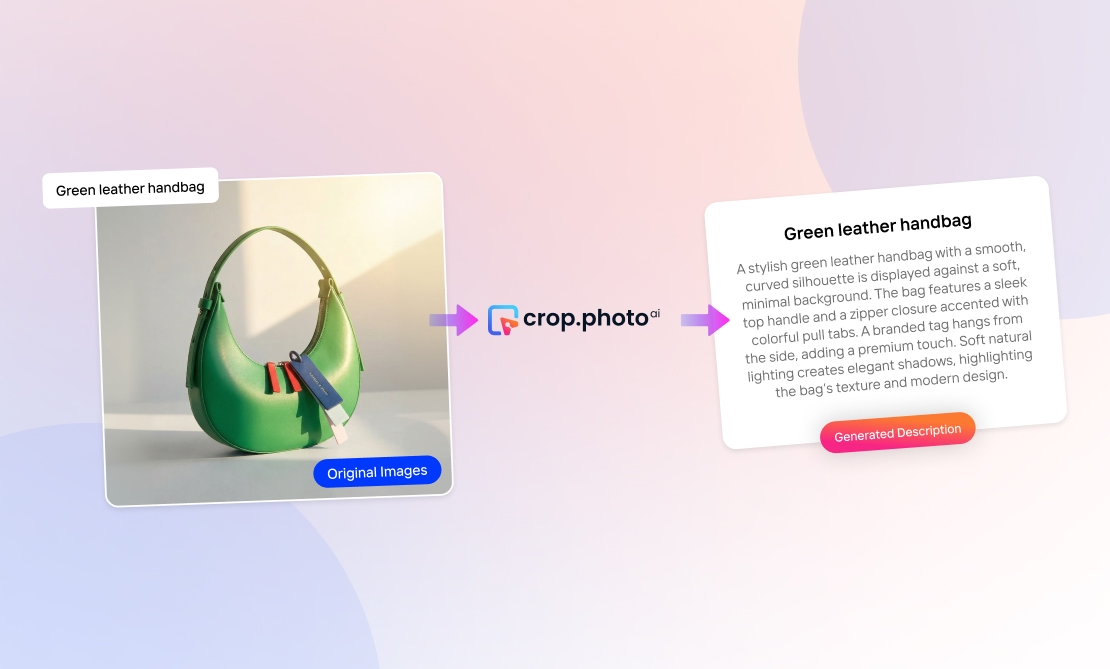
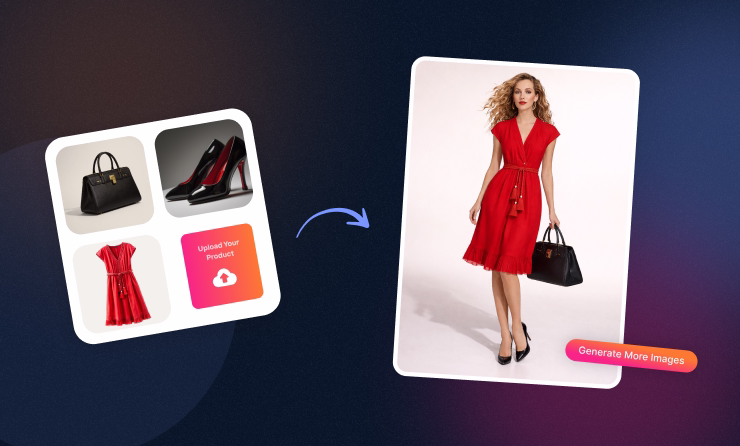
1. Crop.Photo
Got a large collection of product images you need to resize for your e-commerce store? Crop.photo can help!
It’s an online tool that uses content-aware scaling to bulk-process product images effortlessly. The tool can resize your images while preserving the important details such as the product’s shape and texture.
Crop.photo also adjusts your images to the perfect fit for your target aspect ratio. This ensures your images look their best on different devices and platforms especially e-commerce marketplaces.
You can pair the batch photo resizer software with the Bulk Background Remover for more control over your product photos!
2. Image Resizer
This free and open-source software is good for those who want more control over the resizing process.
The bulk Image Resizer lets you specify the exact dimensions of the resized images and the quality of the output.
3. Bulk Resize Photos
Bulk Resize Photo online tool is another great option for those looking for a simple and easy-to-use program.
It’s a 100% free way to resize multiple images at once with just a few clicks!
How to Use a Bulk Image Resizing Program: A Comprehensive Guide
Here are the basic steps to bulk resize images:
- Choose a batch image resizer. With different programs available pick one that meets your needs and budget (if you’ll be using other features that aren’t free).
- Gather your images. You can resize images from your computer, a cloud storage service or a website.
- Set the resizing options. This includes the output size, resolution and file format.
- Start the resizing process. The program will resize the images according to your settings.
- Save the resized images to your computer or on the cloud.
Bulk Image Resizing Made Easy: Tips and Techniques
With a little effort, you can easily resize your batches of images without hassle. Consider the following tips to minimize mistakes:

- Start with high-res source images to get better quality resized images.
- Use a good resizing algorithm like Bicubic or Lanczos to resize without losing quality.
- If you want to preserve image quality use a lossless file format like PNG or TIFF.
- If you want to reduce file size use a lossy file format like JPEG. Adjust the compression level to find the right balance between file size and image quality.
- Test the program on a few images before resizing the entire collection to ensure you like the results.
- Save the resized images in a separate folder to keep the originals intact.
Troubleshooting Common Issues in Bulk Image Resizing
Sometimes bulk image resizing can cause some common issues. Here’s how to fix them:
- Quality loss: Adjust the compression settings to find the right balance between size and quality. Your best bet is to choose a lossless compression format.
- Aspect ratio distortion: Keep the original aspect ratio to avoid distorting the content.
- Overwriting original images: Be careful when setting the output folder for the resized images. Always backup your original files before bulk resizing to avoid accidentally overwriting them.
Best Practices for Image Management
Managing a large number of images efficiently starts with the right approach to resizing and organization. One of the best practices is to use a bulk image resizer to resize images to custom dimensions rather than handling each image one by one. This saves time and ensures all your resized images have the same dimensions and format which is crucial for a professional and cohesive look.
When resizing images in bulk always pay attention to the aspect ratio to prevent distortion. Many image resizer tools have preset sizes and custom dimension options making it easy to match the exact requirements for your website, marketplace or social media platform. Using features like drag and drop to add images quickly and download the finished batch as a zip file can further streamline your workflow and keep your files organized. If you also need to compress multiple images, dedicated tools can help you optimize file size while maintaining quality.
By following these best practices - using preset sizes, maintaining aspect ratio, using drag and drop functionality and organizing your resized images in clearly labeled folders - you can optimize your image management process. This makes your workflow more efficient and ensures your images are always ready to use no matter the project or platform.
In Conclusion
A bulk image resizer can be the perfect tool for saving time and improving the efficiency of your workflow. By following the techniques in this article, you can easily resize your images in bulk without sacrificing quality level.
Choose the right tool and settings first. Then test the software before working on your batch of images.
And be aware of quality loss and fix it using the troubleshooting tips above. Bulk image resizing is error free!