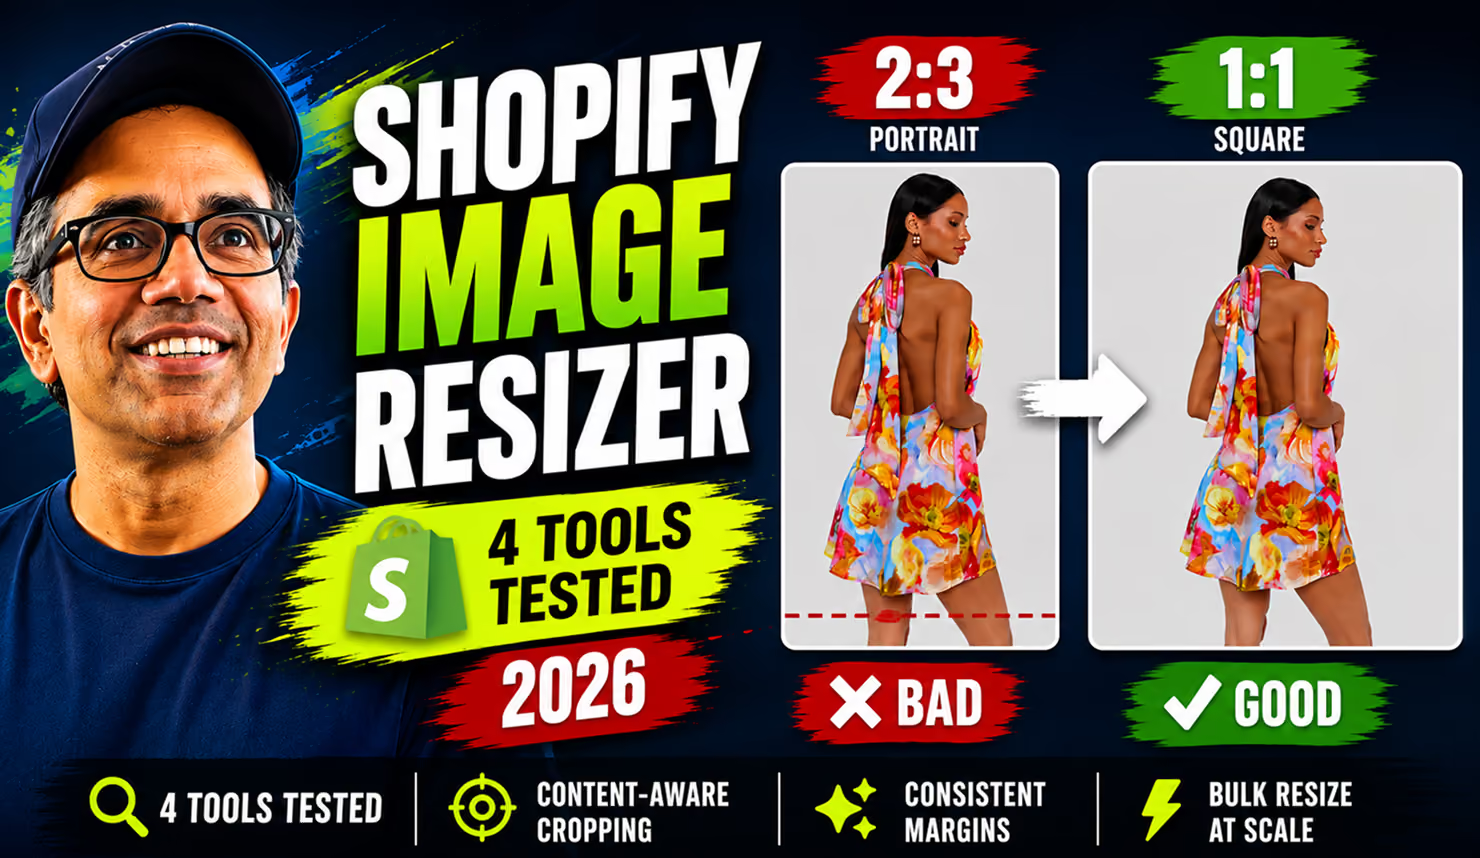
Your Retailer Spec Sheet Just Landed. Here's What It Takes to Hit It Across Macy's, Bloomingdale's, Nordstrom & Saks
The email arrives from your buyer's team with an attachment: Image_Specs_FINAL_v3.pdf. On-sale date is already locked. And somewhere between the line review and the launch calendar, hitting these specs across your whole catalog became your problem.
If you manage ecommerce for a wholesale fashion brand, you know the feeling. Getting the order is the milestone everyone celebrates. Getting a few 1000 product SKUs each with 4-8 images through the image requirements of four retailers at once is the part that quietly eats your launch - and it lands on your desk, not the buyer's.
[GRAPHIC: Hero, 2:1 (1240×620). An inbox with a PDF attachment "Image_Specs_FINAL_v3.pdf" on the left → four retailer "spec cards" fanning out to the right, each with slightly different dimension callouts. Caption: "one catalog, four spec sheets."]
The two options on your desk, and why neither feels good
Once the sheet lands, you've basically got two levers, and you already know the downside of each.
Outsource it. Hand the catalog to an editing/seller agency or offshore team. It works, but you're paying per image, waiting on turnaround, and burning cycles on project management, revision rounds every time a background isn't quite clean or a crop position drifts. Multiply that by 4 retailers with 4 rulebooks and the cost - and the calendar - balloon fast.
Keep it in-house. Your own graphics team is good. They're also already underwater with everything else the business needs from them this quarter. Dropping a full catalog reformat on them means something else slips, or overtime, or both. And it's genuinely unglamorous work: nobody on a creative team wants to spend two weeks resizing on-model back views to a spec sheet.
So you do what everyone in your seat is doing right now: you look at the AI buzz and wonder whether this is the thing you can finally take off the plate. Which is the right instinct, as long as you know which parts actually automate and which don't. We'll get to exactly that below.
How the specs actually reach you (messier than a webpage)
First, the thing that makes this harder than it should be: these requirements rarely live on a tidy public page.
Usually the sheet arrives as a PDF from your account team, or it's buried in a vendor portal you got access to during onboarding - macysnet for Macy's and Bloomingdale's, the Nordstrom vendor portal for Nordstrom, the Saks vendor partners portal for Saks. Some of it is public; a lot isn't. And official guidance often includes a line like "these differ from the general GS1 image guidelines - confirm with your merchant partner." Translation: the real spec is whatever your buyer's team says it is this season.
And these aren't suggestions - they're checks
Off-spec images don't get a polite warning. They get rejected at upload or flagged in QA by the marketplace, and you're back resizing, cropping while the on-sale date slides. Department stores run on floor-ready, listing-ready standards - the entire model assumes your assets arrive correct. Miss the background rule or the framing rule and the image bounces; repeated non-compliance can carry real penalties further down the chain.
So the job isn't "make nicer photos." Your photography is fine. The job is: take shots you already have and conform them to 4+ different rulebooks, fast, without re-shooting.
First split every spec sheet in two: product shots vs on-model shots
Here's the thing most people miss when they estimate this work. Every retailer spec sheet is really two sheets stapled together, and the two halves automate very differently.
Product shots - the garment, shoe, or accessory alone, no person. Flat lays, packshots, three-quarter shoe angles. These are pure geometry: put the object on white, center it, resize to the frame. No human judgment about where a person’s body sits. This is the safest, most fully automatable half.
On-model shots - a person wearing the product. This half carries rules a product shot never has: where do you cut the head (the "headless crop" line), how much room do you leave below the waist, knees or feet, and whether the frame is full-length, three-quarter, or torso-only. This is the half everyone's actually nervous about automating - and the half we'll spend the most time on.
[GRAPHIC #2: Split panel. Left "PRODUCT" - a flat-lay garment centered on white with margin callouts. Right "ON-MODEL" - a figure with a dashed line between the eyes & nose (crop line) and a small gap under the feet (margin). One label each. See Figma
What each retailer actually wants
Product shots - the specs
Dimensions and background, per retailer. (Marketplace-track figures shown where public; wholesale/PDP specs come from your account team.)
For bags, flat lays and shoe angles, spec sheets also fix margins - e.g. a set top/bottom and side margin for flat lays, and separate max pixel margins for lengthwise vs three-quarter shoe shots - so a footwear grid lines up shoe-to-shoe. Those numbers are retailer- and program-specific; get them from your sheet.
Retailer
Image size (Flay lay)
Margins (pixel)
DPI
Background
Format
Macy's
1768 × 2160 px (4:5)
Top/Bottom: 170, Sides: 530
72
Pure white (RGB 255,255,255)
JPEG
Bloomingdale's
2000 × 2000 px (1:1); apparel packshot 1200 × 1500 px (4:5)
Top/Bottom: 55, Sides: 160
300
Pure White — keep shadows & reflections
TIFF
Nordstrom
3900x5850 (2:3)
Top/Bottom: 980, Sides: 205
300
Pure white (RGB 255,255,255)
TIFF
Saks Fifth Avenue
2000x2667 px (3:4)
Top/Bottom: 360, Sides: 480
72
Pure white (RGB 255,255,255)
JPEG
On-model shots - the specs everyone underestimates
This is where the spec sheet stops being about dimensions and starts being about framing a human body consistently across thousands of images. Three rules do most of the work.
Retailer
Image size (On-model)
Face Crop
Margins (pixel)
DPI
Background
Format
Macy's
3894 × 4755 px (4:5)
Between eyes & nose
Top/Bottom: 20, Sides: 530
72
Pure white (RGB 255,255,255)
JPEG
Bloomingdale's
1200 × 1500 px (4:5)
Between nose and mouth
Top/Bottom: 50, Sides: 160
300
Pure White — keep shadows & reflections
TIFF
Nordstrom
3900x5850 (2:3)
Between the eyes and nose
Top/Bottom: 300, Sides: 830
300
Grey #F1F1F1 with a soft gradient
TIFF
Saks Fifth Avenue
2000x2667 px (3:4)
Between nose and mouth
Top/Bottom: 360, Sides: 480
72
Pure white (RGB 255,255,255)
JPEG
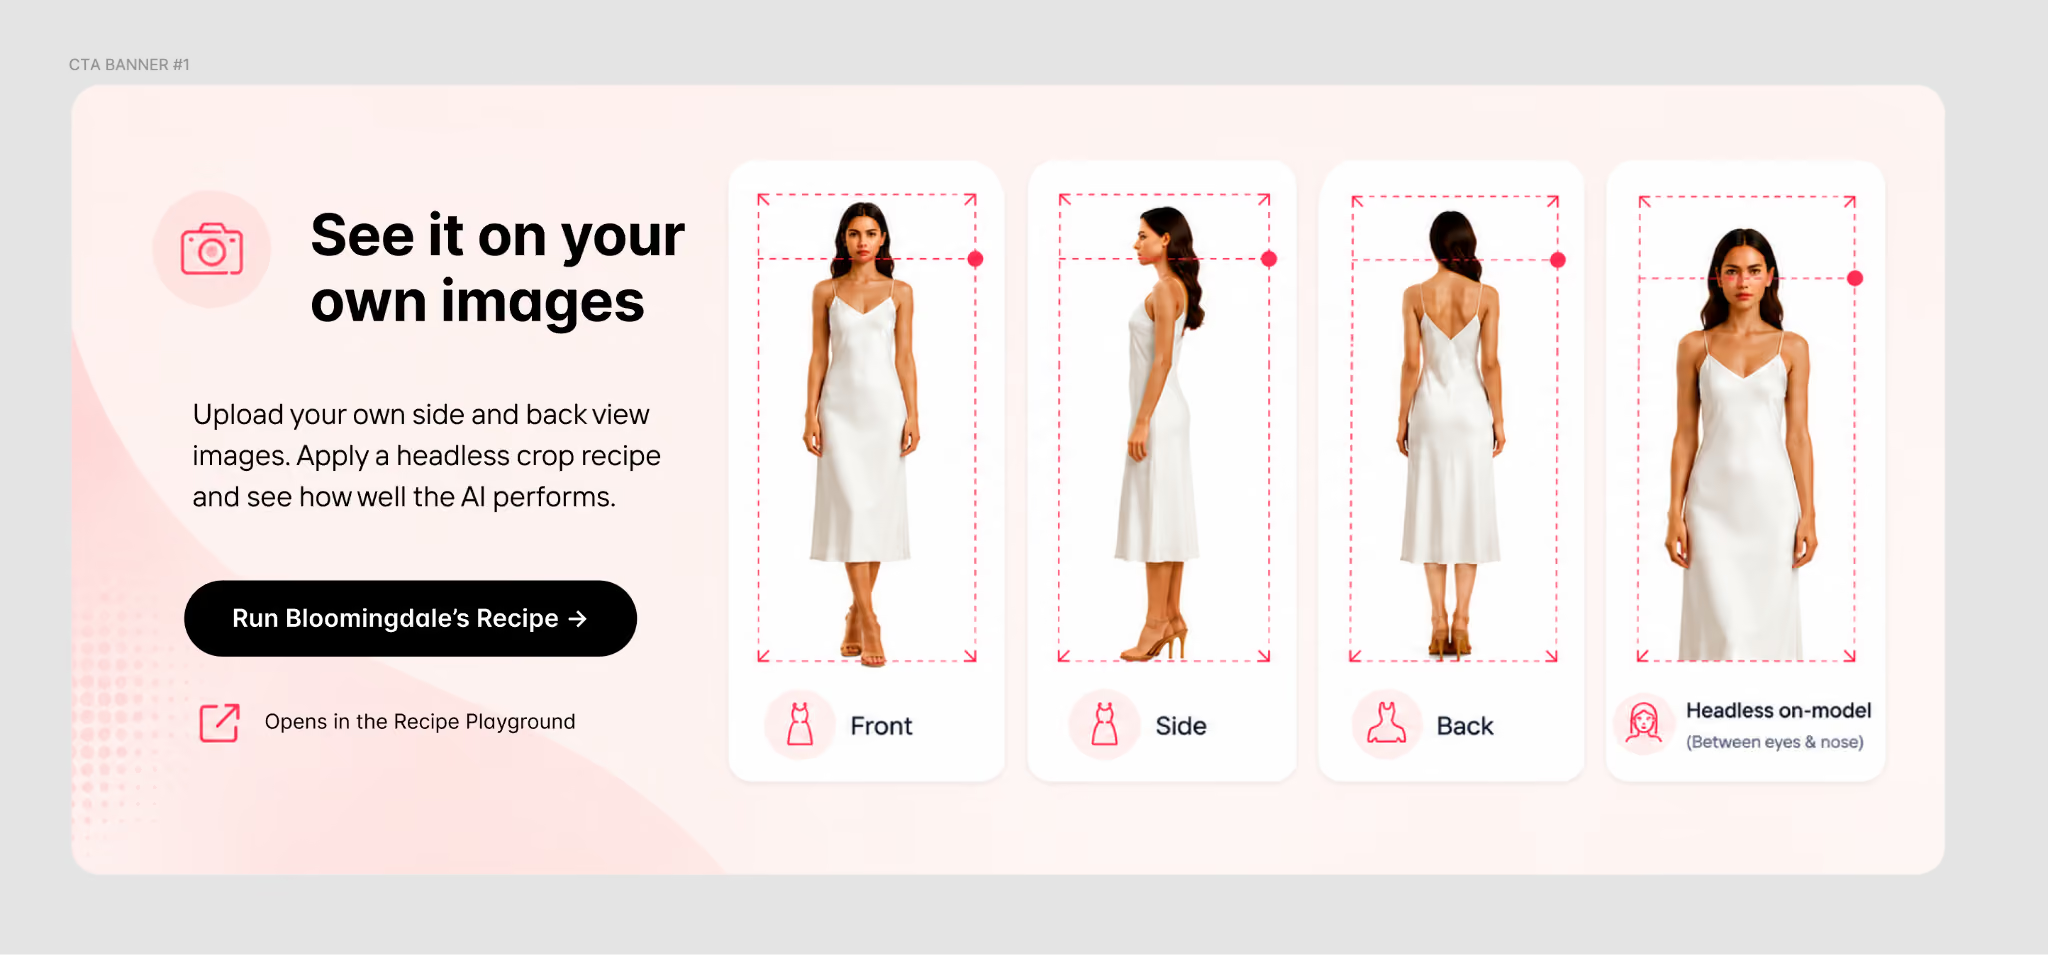
1. The headless crop line - where the top of the frame cuts the head. For headless on-model images, retailers don't say "remove the head," they specify exactly where the cut lands, and it varies:
- Between the eyes and nose - a higher cut (Nordstrom-style).
- Between the nose and mouth - a lower cut (Amazon- and Bloomingdale's-style).
- No face crop at all - full head kept in frame (some footwear and off-price programs).
A few pixels of drift here is a rejection, because it breaks the uniform look down a category page. This is the single most fiddly thing to do by hand across a catalog - and, done right, one of the most mechanical to automate.
2. The margin below the feet (and above the head). Full-figure shots specify a maximum top/bottom margin - typically in the range of ~20–50 px depending on retailer - with one important piece of logic: it's a max. If the model's body already reaches the bottom edge of the frame, you add no margin; if the body floats short of the edge, you pad up to the max. That conditional is exactly the kind of rule a human editor gets subtly wrong on image #743.
3. The framing tier - full-length vs three-quarter vs torso-only. Dresses often run full-length or thigh-to-head; tops and jackets run torso-only or three-quarter. The spec sheet dictates which, and every SKU in a set has to match so the grid reads cleanly.
[GRAPHIC: Three on-model frames side by side - one showing the eyes/nose crop line, one the nose/mouth line, one full-head. Below, a full-length figure with a labeled "max margin below feet (≈10–40px)" gap, plus a second version where the feet touch the edge labeled "body touches edge → no margin."]
[Specs table]
The pattern hiding inside the four spec sheets
Step back and the rulebooks rhyme: pure white (or white-with-shadow) backgrounds, product centered and consistently sized, fixed on-model framing and crop lines, and zoom-grade resolution. So don't build four pipelines - build to the strictest version of each rule once, then derive each retailer's variant from that master.
The resolution catch: when your files are smaller than the spec
Look back at those frames — Macy's 3,894 × 4,755 px, Nordstrom 3,900 × 5,850. These aren't web thumbnails; they're zoom-grade, near-print files, and it's true for both halves of the sheet: a flat product packshot and an on-model full-figure both have to hit that pixel count.
Here's what catches brands off guard: your source photography might not be that big. A 1,500–2,000 px studio export — common for product and on-model shoots — can't simply be stretched to 3,900 px. Resize it up and you get a soft, blurry image that fails QA as surely as a wrong crop line or an off-white background.
This is where AI upscaling earns a place in the pipeline, for product and on-model shots alike. Instead of stretching pixels, an upscaling model reconstructs detail — edges, fabric texture, stitching, hardware — to lift a lower-resolution file to the retailer's required frame without the mush. It's the difference between "resize and hope" and actually hitting a 3,900 px spec from a smaller original. And crucially, upscaling doesn't have to be its own step: it runs inside the same recipe as the crop, background, and resize, so a small image file is upscaled, cropped, and made spec-correct in a single pass — not the background-removal-then-upscale-then-resize slog that point tools force on you.
But can the on-model and hard-angle shots actually be automated?
And the on-model shots are where it gets genuinely hard: the side profile, the back view, the three-quarter, the headless crop that has to land on the exact same face-line every time. None of these is difficult to do once — anyone can draw a crop line on a single image. The trouble is doing it identically across the seven or eight images in one listing, then across five retailers that each want a different crop line and margin, then across a few thousand SKUs, all before the on-sale date.
So the honest answer is yes, these can be automated — and the reason matters. The operations are geometric and subject-aware: they find the body in the frame and act on it, so they don't need a face or a front pose. A back view of a jacket is still a subject on a background; the crop, background, and resize logic treats it like the front. The headless crop line is measured off detected facial landmarks, so "between the eyes and nose" lands pixel-identical on image #1 and image #4,000, whether the model faces forward or turns away. The below-feet margin comes off the detected body bottom, including the "touches the edge → no margin" rule. A person could get any one of these right; what they can't do is get all of them right, the same way, thirty-thousand times before the on-sale date.
And the distinction that matters most for a skeptic: this isn't generative AI inventing pixels. Nothing is restyled or hallucinated. Your photography stays your photography — it's reframed to the sheet using subject detection. That predictability is why you can trust it on a back view or a headless crop.
Which is also why you don't have to trust it blindly. What still earns a human pass: extreme angles, transparent or reflective products with ambiguous background edges, unusual props, a subject bleeding off-frame. The workflow isn't "check all 3,000" — it's run the catalog, then QA the outliers. Automation carries the deterministic 90–95%; your eye goes to the handful that need judgment.
[GRAPHIC#3: A row of the same look - front, side, back, three-quarter - each with the identical crop frame and face-line overlaid. One tagged "needs review" to make the QA point.] See Figma
The reframe: it's just specs - and specs are automatable
Everything on those sheets is deterministic: a dimension, an aspect ratio, a background color, a crop line, a margin, a file type. No taste, no judgment - which is exactly what you automate. Instead of an editor opening each image, cropping by eye, fixing the background, exporting, then repeating per retailer, you define the output once as a recipe and run the catalog through it - product shots to their frame, on-model shots to the right crop line and body-part driven margins, every SKU consistent. Thousands of images, one pass. And if some source files land under the retailer's pixel floor — whether it's a flat packshot or an on-model shot — the same pass upscales them to spec, so resolution stops being the thing that blocks a launch.
CTA Banner #1:
See it on your own images
Run a handful of your shots - including a back view and a headless on-model, the ones you're skeptical about - through an AI recipe and judge the output yourself.
[→ Open the department-store image recipe](LINK: recipe playground) (opens the live playground - upload a few shots, run it)
[Implementation: link out, clearly labeled - One CTA here, one at the end.]
Figma
How a real brand did exactly this: Mavi
Not theoretical. Mavi - a denim and fashion brand selling into US department stores including Macy's and Bloomingdale's - hit precisely this wall: one catalog, multiple retailers, product and on-model rules, a fixed deadline. Rather than reformat by hand per store, they ran their images through spec-correct AI recipes inside Shopify app and got catalog-ready output without the manual grind.
[GRAPHIC: Pull-quote card with the Mavi 5-star recognition angle. Before/after: original on-model shot → spec-correct headless crop.]
[→ Read the Mavi case study](LINK: Mavi case study) - one catalog, made spec-correct for the retailers they sell into.
See
Where that leaves you
Split every spec sheet into product and on-model. Product shots are pure geometry - the easy, fully automatable half. On-model shots carry the crop line and feet-margin rules that trip up manual work and that body-aware automation handles cleanly. Build to the strictest version once, automate the deterministic 90%, and QA the outliers.
Get the sheet from your account team. Build to the strictest rule. Press go.
[→ Try the recipe on your catalog](LINK: Macy’s recipe playground) · [→ See how Mavi did it](LINK: Mavi case study)
FAQ
(mark up as FAQ Page schema - primary GEO/AI-citation target)
What's the difference between product and on-model image specs?
Product specs govern a garment or item shown alone - dimensions, white background, centering, and flat-lay/shoe-angle margins. On-model specs govern a person wearing the product and add framing rules a product shot doesn't have: where to crop the head, how much margin to leave below the feet, and whether the shot is full-length, three-quarter, or torso-only.
Where do retailers crop the head on headless on-model images?
At a specified facial line, and it varies by retailer. A higher cut falls between the eyes and nose (Nordstrom-style); a lower cut falls between the nose and mouth (Amazon- and Bloomingdale's-style). Some footwear and off-price programs use no face crop and keep the full head in frame. A few pixels of drift can trigger rejection because it breaks category-page uniformity.
How much space should be left below the feet in a full-length on-model shot?
A maximum top/bottom margin, typically in the ~10–50 px range depending on the retailer - applied only if the body doesn't already reach the frame edge. If the model's feet touch the bottom, no margin is added.
Can on-model shots - side angles, back views, headless crops - be automated? Yes. The operations are geometric and subject-aware: crop, background, resize, headless crop line, and feet margin are computed off the detected body and facial landmarks, so they work on side, back, and three-quarter views without needing a front pose.
Is this generative AI that changes my photos? No. Conforming images to a spec is deterministic - resize, crop, background, framing via subject detection. Your photography isn't restyled or invented; it's reformatted to the rulebook, which is why it's reliable even on back views and headless crops.
What size should product images be for Macy's? Macy's marketplace asks for at least 1000 × 1000 px on pure white (RGB 255,255,255) and resizes toward roughly 1768 × 2160 (flat) or 3894 × 4755 (on-figure), with 200 × 200 swatches. Wholesale/PDP imagery is governed separately under Macy's Vendor Standards - confirm with your merchant partner.
What are Bloomingdale's image requirements? Fashion/apparel main images build on 1200 × 1500 px (4:5); home items on a minimum 2000 × 2000 px square, on white that retains shadows and reflections. Off-ratio gets cropped; swatches are required for textiles and multi-color variants.
Do Nordstrom and Saks publish their image specs? Not publicly. Both deliver image specifications through their vendor portals and merchandising teams. Get the current sheet from your contact and build to it rather than relying on third-party numbers.
Do I need different images for each department store? In practice yes - each enforces its own dimensions, crop lines, and margins - but not separate shoots. Build to the strictest version of each rule once, then derive each retailer's variant from that master.
What if my product or on-model images are lower resolution than the retailer requires?
Don't stretch them — that produces soft images that fail QA. Use AI upscaling, which reconstructs detail (edges, texture, stitching) to lift a lower-resolution file to the required frame, such as Macy's 3,894 × 4,755 px, Nordstrom 3,900 × 5,850 px. This applies to both product and on-model shots. Upscaling adds resolution but not detail that was never captured, so start from the cleanest source file you have.